Friday 30 June 2017

Art Journal Page - Step by Step by Susanne

Hi there!

Susanne writing today! I have to share a step by step art journal page with you.


The butterflies are free printables. I found them on Pinterest. I printed them on gelli printed paper and cut them out. I adhered them to a page in my Traveler's Journal. The page was also a gelli print. I adhered some pattered papers and added a thin layer of gesso on top.


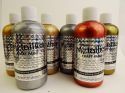
I added Brusho Scarlet with a brush:


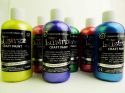
I did the same with Brusho Emerald Green and Sunburst Lemon. I added some stamping to add texture. I used stamps from Rubber Dance.


To make the butterflies pop, I use a Derwent Inktense pencil to add a shadow arround the butterflies:


Finally I added some black and yellow colour splatters and the sentiment:


Here are some close ups:


I hope you like my page!
Thank you so much for stopping by today!

Supplies:


Wednesday 28 June 2017

How To Add Vibrant Colour To Scrapbook Page by Katie

                                                                           Hi all

I have a mixed media layout to share along with a few ideas on how to use the Brusho Crystal Powders to add bright colours to your scrapbook pages.


I took  a photograph and cropped it to size before mounting it onto patterned paper. Next i  marked out  where the photo was going to be placed and then i added gesso around it with a palette knife. Once dry i spritzed the whole thing with water and sprinkled over OST Blue and Turquoise Brusho powders.


I then added a few stencils using modelling paste and added more Brusho powder over the top. Next i cut up pieces of cheese cloth and sprinkled Turquoise and Sea Green Brusho powder over the top and added water to activate the dye. I  Cut up some strips off patterned paper and add gesso to them before adding Brusho powder and then texture stamps onto the layers. I  positioned them onto the layout and once i was happy with the arrangement i glued them down. I then added the photo and glued the dyed cheese cloth around it like a textured frame.


Next i took some white hessian and dyed it blue using OST Blue Brusho powder. I just sprinkled on the powder and then painted water over it to get a more faded look. I cut up the hessian into pieces and glued it around my layout.


I added texture stamps around the layout and then glued sea green seed beads  over the cheese cloth. I decorated around the layout with mini shells and starfish. I painted the wooden embellishments with gesso and then painted on  the brusho powder once it had dried. Brushos can be mixed with a little water and used as a watercolour paint.


Thank you for visiting


Monday 26 June 2017

4 Simple yet effective Brusho Backgrounds by Terri Koszler


Today I am sharing 4 simple Brusho Backgrounds that are quick and easy yet so effective.


  • For my first background I coated a piece of watercolour card with water and then sprinkled brusho on to the surface allowing it to bleed and travel on the surface.


I used Orange,Yellow and Vermilion Brusho.


  • For my second card I sprinkled brusho powders onto dry watercolour card and then spritzed with water, I like this using this method as I can direct the water spray to create movement with the colour.


I used Violet, Leaf Green and Ultra Marine Brusho


  • In the third card I diluted the brusho crystals with water and added colours drop by drop into a wet background, I always try to add colours in a triangle formation, each colour gets placed 3 times like the points on a triangle, I think this gives a balanced look.


I used six coulors in this background Yellow, Violet, Orange, Leaf Green, Ultra Marine and Vermilion.


  • This last technique is new to me and involved a food bag. I cut the handles off, one side seam and the base of the bag, this leaves me with a flat piece of polythene.


I lay the bag on my work surface and place drops of mixed brusho, I used 3 colours in this example.

I then lay my water colour card on top of the bag and turn the bag and card over. I now scrunch and move the bag around, this helps the colour to move on the surface of the card creating patterns

Here's a quick video showing the technique


All of the backgrounds were mounted onto black card and had a sentiment added to them using Altenew's Painted Inspiration stamp set which I heat embossed in black.


Wednesday 21 June 2017

Video - introduction to Aztec Craft Paints by Kate

Hi,

today I prepared for you video with all information about super Aztec Craft Paints - Lustres and Mettalics. I have also for you tons of samples to show you how cool are these paints.


Have a nice day
Kate Dachovska
www.katecrafts.com


Monday 19 June 2017

Moroccan Summer by Ewelina Gryglak

Hello and welcome to my fortnightly craftiness.

I don't know about where you are but here, in South Yorkshire, the temperature is as high as 33 degrees and I am wishing for some nice and cool place to hide in.

The sticky, hot weather made me also think about travelling... Morocco is my inspiration for today's project.


After gluing the chipboards to the sheet, I created the background with Brusho powders. 


I used the Aztec Eco Metallic Paint in Antique Gold to colour the chipboards. I also smeared it on the edges and around the background with my finger.


With Black Archival Ink, I added the mandala stamp and, using white acrylic pen, I added some stencil designs in the corners.


To finish, I glued on some fabric flowers in co-ordinating colours.

You can view the process here:


Thank you for stopping by!

Ewelina


Related Posts Plugin for WordPress, Blogger...